Save to Pinterest
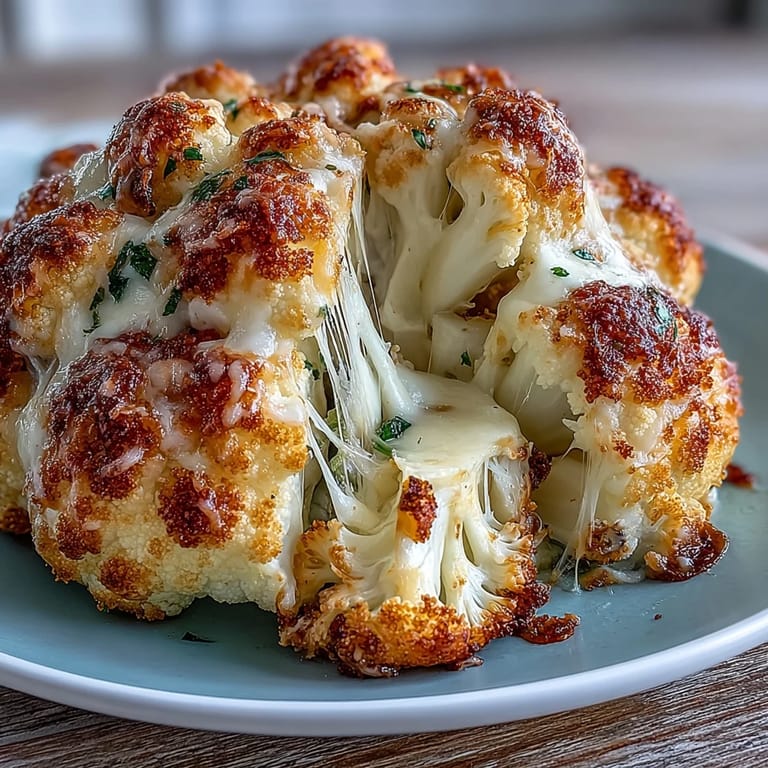
 My cousin brought a whole roasted cauliflower to a dinner party last spring, and I watched everyone's face light up the moment it arrived at the table. What struck me wasn't just how beautiful it looked—golden, steaming, almost like edible sculpture—but how a single vegetable could feel like the main event. That night, I tasted cheese melted into every crevice, and something clicked: this wasn't complicated cooking, just a clever way to make people actually excited about vegetables. Now whenever I need to impress without fussing, this is what I make.
I made this for my flatmate's birthday dinner when she mentioned craving something that felt special but wasn't heavy. The moment she saw me slice into it and that creamy, cheesy center revealed itself, her whole expression changed. She called it restaurant-quality, and honestly, that compliment meant more than any takeout ever could.
Ingredients
- 1 large whole cauliflower (about 1 kg): Choose one with tightly packed florets and a sturdy base; it's your canvas, so pick one that feels solid and unblemished.
- 1 tbsp olive oil: The gentle coating that helps everything toast to golden perfection.
- Salt and black pepper: Season the outside generously because it's your only seasoning there.
- 150 g cream cheese, softened: The creamy binding agent that holds everything together; soften it at room temperature so it mixes smoothly without lumps.
- 100 g shredded mozzarella cheese: This melts beautifully and adds stretch and mild flavor that doesn't overpower.
- 50 g grated Parmesan cheese: The umami whisper that makes people ask what's in it.
- 2 tbsp chopped fresh chives: Fresh herbs brighten the filling, so use them if you can; dried chives work but won't have quite the same snap.
- 1 garlic clove, minced: One clove is enough to add depth without overpowering the cheese.
- ½ tsp smoked paprika and ¼ tsp ground nutmeg: These spices create warmth and complexity that elevate simple cheese into something craveable.
- 1 tbsp milk: Just enough to loosen the filling so it spreads into those tight floret spaces.
- 50 g shredded cheddar cheese and 2 tbsp breadcrumbs: The topping that gets golden and crispy, creating that textural contrast everyone loves.
- 1 tbsp melted butter: Toss it with the breadcrumbs so they toast rather than stay pale.
Tired of Takeout? 🥡
Get 10 meals you can make faster than delivery arrives. Seriously.
One email. No spam. Unsubscribe anytime.
Instructions
- Get your oven ready:
- Preheat to 200°C (400°F) and line a baking tray with parchment paper so nothing sticks and cleanup is effortless.
- Trim the cauliflower:
- Remove outer leaves carefully, then trim the base flat enough that it sits stable on the tray without rocking. You want the crown of florets intact so it holds its shape.
- Parboil for tenderness:
- Bring a large pot of salted water to a boil and submerge the whole cauliflower for 8–10 minutes until just fork-tender but still holding together. Drain well and let it cool enough to handle; this step is crucial because it softens the dense center so the filling can seep in.
- Mix the cheese filling:
- Combine softened cream cheese, mozzarella, Parmesan, chives, minced garlic, paprika, nutmeg, and milk in a bowl until it's smooth and spreadable. Taste it and adjust seasoning if you like; this is your moment to tweak.
- Stuff with intention:
- Place the cooled cauliflower on the prepared tray and use a small sharp knife to make deliberate cuts into the base and between florets, creating little pockets. Use a spoon or your fingers to gently press the cheese mixture into every crevice and down into the center, working patiently so it distributes evenly.
- Season the outside:
- Brush the whole exterior with olive oil and sprinkle with salt and pepper; this is what creates that golden, savory crust.
- Add the topping:
- Mix shredded cheddar with breadcrumbs and melted butter, then scatter it evenly over the top and sides so it toasts uniformly.
- Roast until golden:
- Bake for 40–45 minutes until the cauliflower is deep golden, the cheese is bubbling at the edges, and a knife pierces the center easily. The aroma will tell you when it's close.
- Rest and serve:
- Let it rest 5 minutes so the cheese sets slightly, then slice into wedges with a sharp knife using gentle pressure to keep the filling intact.
 Save to Pinterest
 There's something deeply satisfying about cutting into this at the table and hearing the little gasp when people see the cheese-filled interior. It transforms a simple vegetable into a moment, a story worth telling the next day.
Variations That Work
This recipe loves experimentation. I've added roasted mushrooms to the filling for earthiness, stirred in sun-dried tomatoes for brightness, or swapped the herbs completely. One version with roasted garlic instead of raw, combined with crispy sage in the breadcrumb topping, tasted like autumn on a plate. The structure is forgiving enough that you can play while keeping the foundation solid.
Pairing and Serving
This stands perfectly on its own as a vegetarian main, but it's also the kind of side dish that steals attention from whatever else is on the table. A bright green salad with lemon vinaigrette cuts through the richness beautifully, and roasted root vegetables alongside add earthiness and color. I've served it warm, room temperature, and even the next day cold, and it holds its appeal each time in a different way.
Storage and Make-Ahead Tips
You can prep the stuffed cauliflower earlier in the day, cover it loosely, and bake when you're ready; just add a few minutes if it's been refrigerated. Leftovers keep for 3 days and reheat gently in a low oven so the cheese doesn't separate. This is one of those dishes that feels like a luxury but fits naturally into busy weeknight cooking once you've made it once.
- Assemble everything up to baking in the morning and refrigerate; add 5 minutes to baking time if cold.
- Leftover wedges are excellent served at room temperature with a dollop of sour cream or fresh herbs.
- Freeze the unbaked stuffed cauliflower; thaw overnight and bake as normal, adding a few extra minutes if needed.
 Save to Pinterest
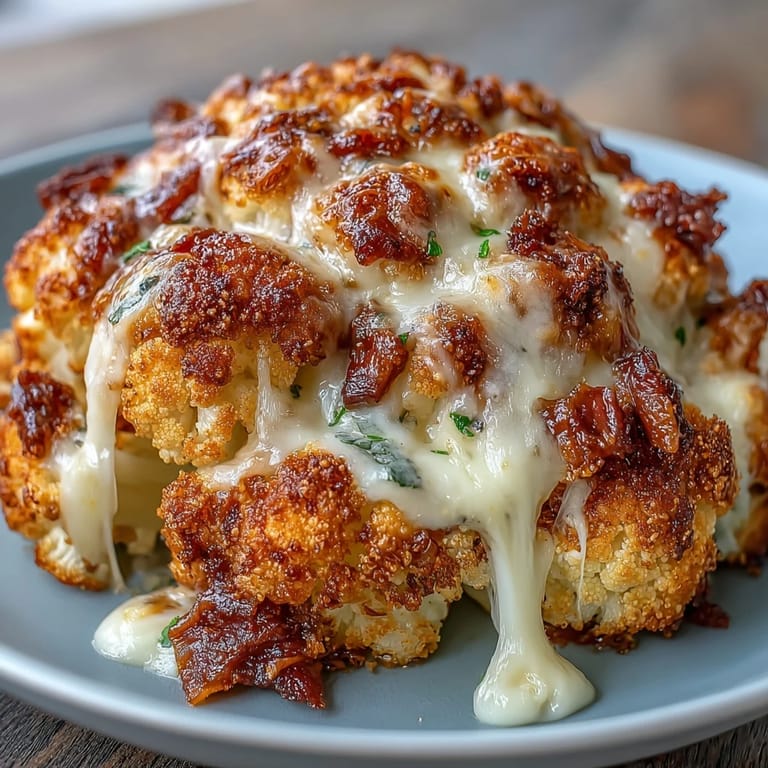
 This whole cauliflower has a way of turning an ordinary dinner into something memorable, and that's really all cooking should be. Make it once, and it'll become a favorite you return to.
Recipe Questions & Answers
- → Can I prepare this ahead of time?
Yes, you can par-boil and stuff the cauliflower up to a day in advance. Store it covered in the refrigerator, then add the topping and bake when ready to serve. You may need a few extra minutes of baking time if starting from cold.
- → What other cheeses work well in the filling?
Gruyère, Swiss, or sharp cheddar add great depth of flavor. For a lighter version, try part-skim mozzarella or reduce the cream cheese amount and add Greek yogurt for tanginess.
- → How do I know when the cauliflower is fully cooked?
The cauliflower is done when it's golden brown on top, the cheese is bubbling, and a knife inserts easily into the thickest part of the stem with no resistance. The florets should be tender but not falling apart.
- → Can I make this dairy-free?
Substitute vegan cream cheese and dairy-free shredded cheese blends. Nutritional yeast adds savory depth, and coconut oil can replace butter in the topping for a plant-based version.
- → What should I serve alongside this dish?
A crisp green salad with vinaigrette cuts through the richness. Roasted vegetables, quinoa, or crusty bread also complement well. For a complete meal, serve with grilled proteins or as part of a vegetarian spread.
- → Why pre-boil the cauliflower before roasting?
Par-boiling ensures the cauliflower cooks through evenly in the oven. Without this step, the exterior would burn before the tender center becomes fully tender, resulting in uneven texture.