 Save to Pinterest
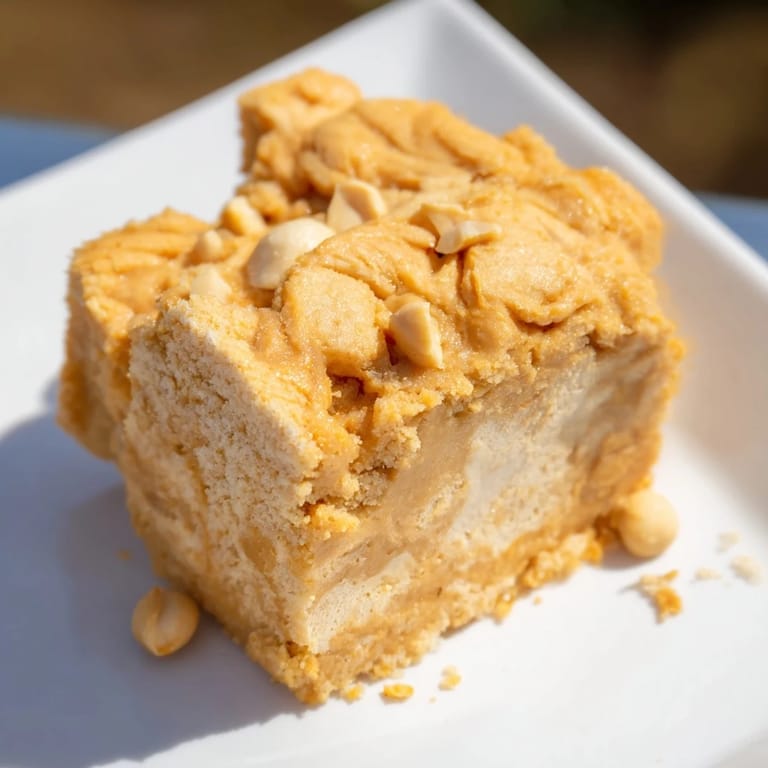
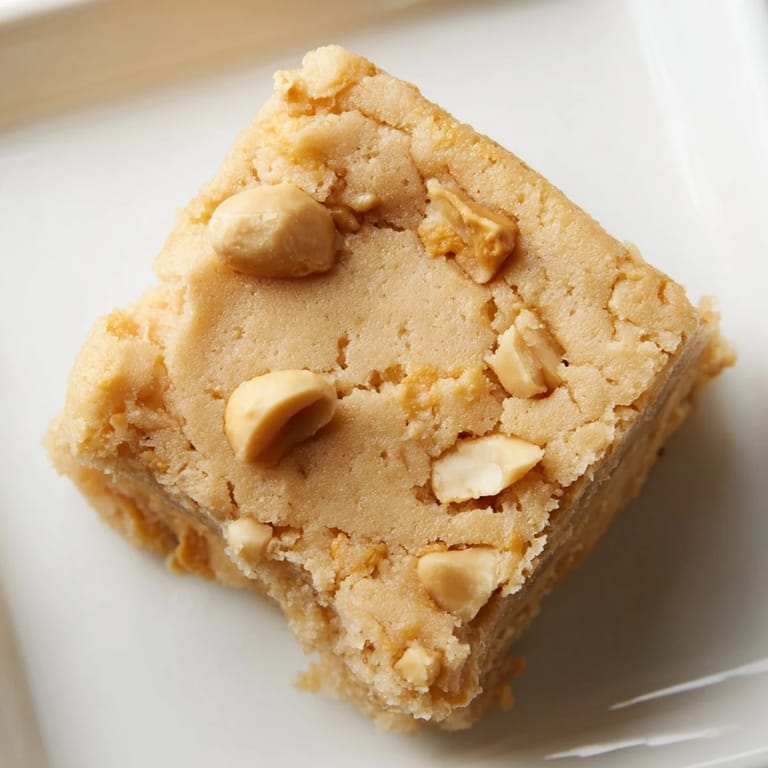
 My neighbor brought over a slice of mochi cake from a local Japanese bakery, and I was immediately captivated by its impossibly chewy texture paired with something warm and nutty. When she mentioned it was peanut butter inside, I couldn't believe how perfectly those two worlds collided on my tongue. That night, I set out to recreate it in my own kitchen, imagining what would happen if I let American comfort food and delicate Japanese technique dance together in the oven. The result was even better than I remembered, with that signature mochi chewiness now infused with creamy peanut butter throughout.
I made this for a potluck once and watched people's faces light up when they realized it was chewy, not cakey, and tasted nothing like what they expected. One friend actually went back for thirds, then asked if I could ship her a slice—which told me everything I needed to know about whether this recipe was worth keeping.
Ingredients
- Sweet rice flour (mochiko): This is the star ingredient that gives mochi cake its signature chewiness and tender crumb; don't substitute with regular rice flour or you'll lose that special texture entirely.
- Granulated sugar: Sweetens the batter evenly and helps create that soft, slightly springy interior.
- Baking powder: Just enough to give the cake a gentle lift without making it light and airy.
- Salt: A tiny pinch that makes the peanut butter flavor pop without tasting salty.
- Whole milk and coconut milk: Together they create a rich, creamy base that keeps this cake from ever feeling dry.
- Eggs: They bind everything together and add that tender crumb structure.
- Creamy peanut butter: The flavor backbone—use the kind you'd actually eat on toast, not the natural stuff with separated oil unless you don't mind mixing it first.
- Unsalted butter: Melted so it blends smoothly into the wet mixture, adding richness and helping everything come together.
- Vanilla extract: Just a whisper to deepen the flavors without announcing itself.
Tired of Takeout? 🥡
Get 10 meals you can make faster than delivery arrives. Seriously.
One email. No spam. Unsubscribe anytime.
Instructions
- Prep your pan and heat your oven:
- Get a 9x13-inch pan ready with parchment paper or a light greasing—this stops the edges from sticking without any drama. Preheat to 350°F so the oven is ready when your batter is.
- Combine the dry team:
- Whisk together the sweet rice flour, sugar, baking powder, and salt in a large bowl, making sure there are no clumps hiding in the flour. This step is easier than it sounds and takes about a minute.
- Blend the wet ingredients until silky:
- In another bowl, whisk the milk, coconut milk, eggs, peanut butter, melted butter, and vanilla until the peanut butter is completely incorporated and you see no streaks. The mixture should look smooth and almost glossy.
- Marry the two teams:
- Pour the wet mixture into the dry ingredients and whisk gently but thoroughly until no flour specks remain and the batter looks velvety. Stop whisking once you've got a smooth batter—you're not making bread, so overworking it won't hurt, but there's no need.
- Into the pan and into the oven:
- Pour the batter into your prepared pan and give it a gentle tap on the counter a few times to release any trapped air bubbles. Bake for 45 to 50 minutes, until the top turns golden brown and a toothpick poked into the center comes out clean.
- Cool completely before serving:
- Let the cake sit in the pan once it comes out of the oven—it will continue to set as it cools and firm up slightly, making it easier to cut into clean squares. Wait until it reaches room temperature, or even chill it for a firmer texture and different eating experience.
 Save to Pinterest
 There's something about cutting into this cake and finding that perfect chew that reminds me why I love baking in the first place—when a simple idea becomes something that brings real joy to a table. It's dessert that feels like a small adventure.
Texture Matters More Than Temperature
This cake is delicious straight from the cooling rack, but I've found it hits differently when chilled. The peanut butter flavor becomes more pronounced, and that chewy center transforms into something almost fudgy and deeply satisfying. Room temperature gives you the softest, most tender version, while chilled adds a slight firmness that some people actually prefer for slicing and eating.
Making It Your Own
The base recipe is so versatile that you can play with it. Some people sprinkle roasted peanuts or chopped chocolate on top before baking for extra texture and flavor. Others swirl a little extra peanut butter across the top of the batter right before it goes in the oven, creating streaks of concentrated richness. You could even replace the coconut milk with evaporated milk if you want a lighter, less tropical flavor profile.
Serving and Storage Secrets
Slice this cake into squares and serve it alongside whipped cream, fresh berries, or a simple vanilla ice cream for an elevated dessert that still feels casual and homemade. It keeps beautifully in an airtight container in the refrigerator for up to four days, and honestly, it might taste even better on day two when all the flavors have had time to meld together.
- A dollop of whipped cream transforms a simple slice into something that feels dessert-fancy.
- Leftover cake is incredible for breakfast if no one's watching, especially with a hot cup of coffee.
- If you need to make it ahead, bake it the day before and store it covered in the fridge.
 Save to Pinterest
 This peanut butter mochi cake is proof that sometimes the best desserts come from combining things that shouldn't work but absolutely do. Keep this recipe close for quiet weeknights or when you want to impress without fuss.
Recipe Questions & Answers
- → What gives the cake its chewy texture?
The chewy texture comes from glutinous rice flour, known as mochiko, which creates a soft yet chewy crumb unlike regular wheat flour.
- → Can I substitute the coconut milk used in the cake?
Yes, you can replace coconut milk with evaporated milk for a lighter flavor, although it may slightly alter the richness.
- → How can I add extra crunch to this dessert?
Sprinkling roasted peanuts on top before baking adds a pleasant nutty crunch that complements the soft layers.
- → Is this suitable for gluten-free diets?
Yes, the use of sweet rice flour ensures the cake is gluten-free, but always double-check product labels for cross-contamination.
- → What serving suggestions work well with this dessert?
This cake pairs beautifully with whipped cream or fresh fruit, enhancing its creamy and chewy qualities.